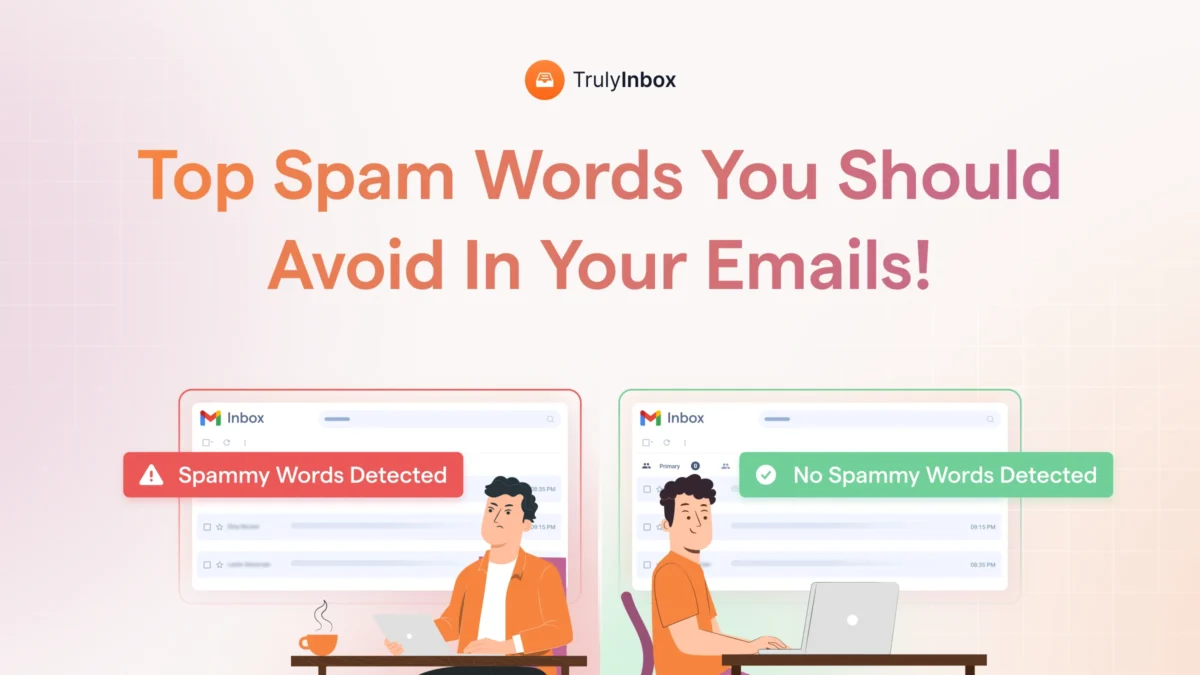
You just found out you’re on an email blacklist. Before you panic, the first question isn’t “how do I get removed?”
It’s “does this blacklist actually matter?”
Most guides treat all blacklists the same. They hand you generic steps and send you off to submit removal forms for lists that have zero impact on your inbox placement.
Here’s the reality.
Being listed on UCEPROTECT L3 is completely different from landing on Spamhaus SBL.
One will destroy your deliverability overnight. The other is background noise.
After managing warmup and deliverability across 40,000+ inboxes at TrulyInbox, I’ve seen which blacklists correlate with real inbox drops. And I’ve seen which ones trigger no change at all.
This blog gives you a severity-tiered framework. You’ll know exactly what to worry about, what to fix first, and what to ignore.
By the end, you’ll know how to diagnose, prioritize, and resolve blacklist issues instead of panicking over every listing.
TL;DR
Not all email blacklists carry equal weight.
- Spamhaus SBL/DBL and Barracuda can tank your deliverability, especially for B2B recipients behind corporate email filters.
- UCEPROTECT L2/L3 and most minor lists have near-zero impact on Gmail and Outlook inbox placement.
The key is diagnosing which list flagged you before taking any action. If you’re on a critical blacklist, fix the root cause first (spam traps, compromised accounts, volume spikes), then request delisting.
If you’re on a low-impact list, monitor but don’t lose sleep.
Continuous warm-up and reputation monitoring prevents most blacklisting before it happens.
Don’t wait for a listing to start caring about your sender reputation.
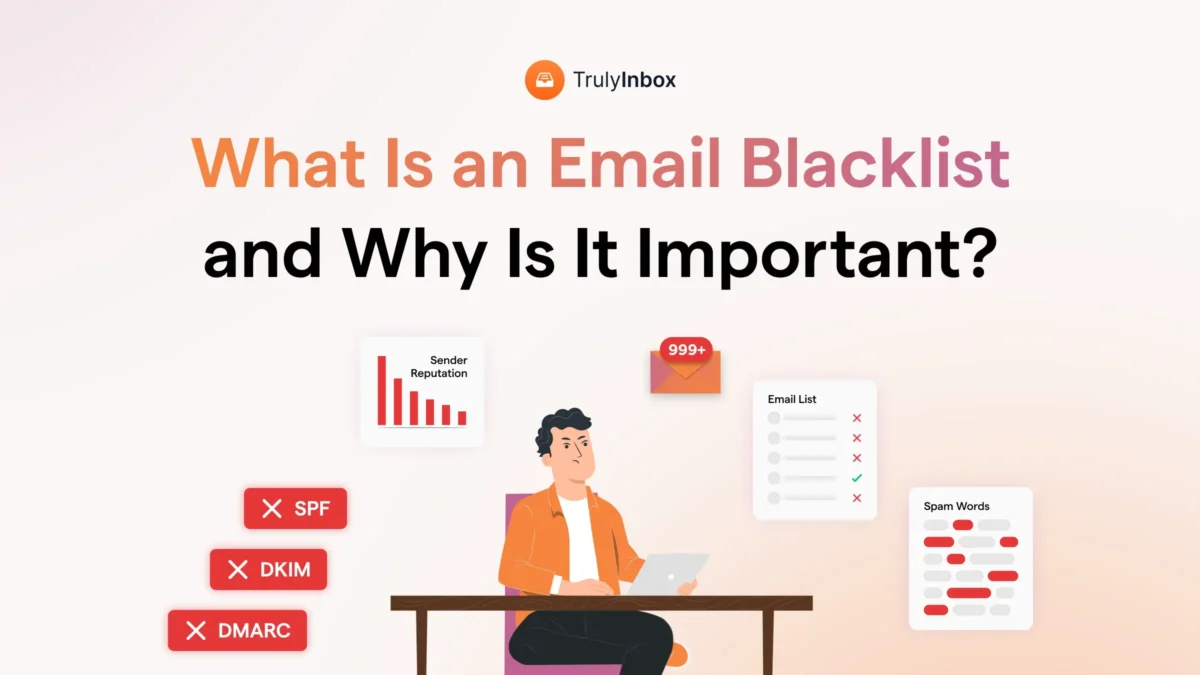
What Is an Email Blacklist (And Why It Exists)
An email blacklist is a real-time database of IP addresses or domains flagged for sending spam or malicious email.
You’ll also hear them called DNS-based Blackhole Lists (DNSBLs) or Real-time Blackhole Lists (RBLs).
Several types of organizations maintain these lists:
- Anti-spam organizations like Spamhaus and Barracuda
- ISPs that track abuse across their networks
- Email providers like Gmail and Outlook, which maintain their own internal blacklists separate from public ones
Blacklists exist to protect recipients. They’re a defense mechanism, not a punishment system. When a receiving server gets your email, it checks one or more blacklists to decide whether your message is trustworthy.
Here’s what most people miss. Different blacklists carry very different weight.
Being on Spamhaus SBL means corporate email filters worldwide will reject your messages.
Being on some obscure list that MXToolbox happens to query means almost nothing.
Think of blacklists as reputation signals, not binary punishments. Some signals scream “block this sender.”
Others are barely a whisper that nobody listens to.
This distinction matters because your response should match the severity. And that’s exactly what the next section gives you.
The Blacklist Severity Framework: Which Ones Actually Matter
This is the most important section of this entire blog. No other guide classifies blacklists by actual deliverability impact.
After monitoring deliverability across thousands of accounts, here’s what actually correlates with inbox drops versus what’s noise.
One critical thing to understand first:
Gmail and Microsoft rarely consult external public blacklists. They rely on their own internal reputation systems.
Public blacklists bite hardest at corporate email filters like Proofpoint, Mimecast, and Barracuda appliances.
With that context, here’s the framework.
Critical Impact (Fix Immediately)
These blacklists will destroy your deliverability if you’re listed. Every hour you stay on them costs you emails.
- Spamhaus SBL (Spamhaus Block List): Corporate email filters worldwide reference this list. It hits B2B deliverability the hardest.
- Spamhaus DBL (Domain Block List): This one operates at the domain level. It sticks with you even if you change IPs.
- Spamhaus XBL (Exploits Block List): A listing here indicates compromised infrastructure, like malware or an open relay on your server.
- Barracuda BRBL: Many businesses run Barracuda appliances for email security. A listing here blocks you from those recipients entirely.
The impact is severe: hard bounces, SMTP 550 rejections, and enterprise email gates blocking you entirely. If you see these errors in your bounce logs, check these lists first.
Moderate Impact (Fix Within a Week)
These lists affect some recipients but won’t tank everything. You have a window to fix the issue without emergency-level urgency.
- SpamCop: Some ISPs reference this list. Listings are time-based and auto-expire in 24 to 48 hours if the spam stops.
- CBL (Composite Blocking List): Feeds into Spamhaus XBL. A listing usually indicates malware or bot-like behavior from your server.
- Invaluement: Catches snowshoe spammers who spread volume across many IPs. Some enterprise filters reference it.
- SURBL: Focuses on URL and domain reputation. It affects link-heavy emails more than plain text messages.
The impact here is partial filtering. Some corporate recipients won’t receive your emails, but Gmail and Outlook users likely won’t notice a difference.
Low Impact (Monitor, Don’t Panic)
These lists exist but rarely affect delivery to Gmail or Outlook. They may cause issues with niche or smaller ISPs.
- SORBS: Its relevance has declined significantly. Some ISPs still reference it, but major providers largely ignore it.
- SpamRATS: Primarily catches dynamic and residential IPs. If you’re sending from a business mail server, this listing is mostly irrelevant.
- PSBL (Passive Spam Block List): Limited adoption across the industry. Very few receiving servers check it.
If you’re only listed on these, run an inbox placement test before taking any action. You’ll likely find your emails still land in the inbox.
Negligible / Ignore (Don’t Waste Time)
These lists cause the most panic for the least reason. Here’s why you should not waste time on them.
- UCEPROTECT Level 2: Lists entire IP ranges, not individual senders. You can appear here because your hosting neighbor spammed. You cannot remove yourself.
- UCEPROTECT Level 3: Lists entire ASNs, which is your hosting provider’s whole network. This is completely outside your control.
- Fabelsources: Minimal adoption. Major providers rarely reference it.
- Many obscure or defunct lists that blacklist checkers still query even though almost nobody uses them.
Here’s the key insight. Being on 2 to 3 obscure ones is normal and is not a deliverability issue.
I regularly see accounts listed on UCEPROTECT L2/L3 with 95%+ inbox placement.
The listing exists, but it causes no measurable impact. Don’t let a blacklist checker scare you into panic mode over listings that nobody checks.
How Email Blacklists Work (The Technical Flow)
Understanding the technical flow helps you diagnose issues faster. Here’s what happens every time you send an email.
Step 1: Your sending server dispatches the email to the recipient’s mail server.
Step 2: The receiving server performs a DNS lookup against one or more blacklists. Which lists it checks depends on its configuration. A corporate Proofpoint server checks Spamhaus and Barracuda. Gmail uses its own internal signals instead.
Step 3: Based on the lookup result, the server makes a pass or fail decision.
That decision leads to one of two outcomes:
- Hard block: The server rejects your email entirely. You get an SMTP bounce back with an error code.
- Soft filter: The server accepts your email but routes it to spam or junk. You get no bounce, and the recipient never sees it.
SMTP Error Codes That Signal Blacklisting
When a blacklist causes a hard block, you’ll see specific error codes in your bounce logs. Here are the most common ones:
- 550 5.7.1 followed by “rejected” or “blocked”: Your IP or domain failed a blacklist check.
- 554 with “IP blacklisted” or “access denied”: The receiving server explicitly rejected you based on a blacklist.
- 421 with “try again later”: Sometimes a temporary block while the server re-checks your reputation.
Save these examples. When you see them in your sending platform, you’ll know exactly what’s happening and which blacklist to investigate.
IP Blacklists vs. Domain Blacklists
There’s an important technical distinction between the two.
IP blacklists check your sending server’s address at the connection stage, before the email content is even evaluated. Domain blacklists check your sending domain at the content filtering stage, after the server has already accepted the connection.
This matters because domain blacklists (like Spamhaus DBL) follow your brand everywhere. You can’t escape them by switching IPs or sending providers.
Why You Got Blacklisted: Root Causes by Scenario
Instead of listing generic causes, let me walk you through the scenarios I see repeatedly. Find the one that matches your situation.
“I Sent a Batch Email to My Existing Customers and Now I’m Blocked”
This is the most common small-business blacklisting scenario. You had a customer list, you sent a promotion, and suddenly your emails bounce.
Here’s what probably happened:
- Your list was stale. Addresses that were valid months ago have become recycled spam traps.
- You sent from a regular inbox, not a proper email marketing platform with bounce handling.
- Your shared hosting IP already had a poor reputation from other senders on the same server.
The fix:
- Verify your list before sending. Remove addresses that haven’t engaged in 90+ days.
- Use proper sending infrastructure that handles bounces and unsubscribes automatically.
- Separate your marketing sends from your transactional business email.
“I Just Started Cold Outreach and My Domain Got Flagged”
New cold emailers hit this wall constantly. You buy a domain, set up email, and blast 500 messages on day one. The result is predictable.
A volume spike from a brand-new domain is an immediate red flag for every mailbox provider. Your domain has zero sending history, which means zero reputation buffer. And if your list contains purchased or scraped contacts, you’re almost certainly hitting spam traps.
The fix:
- Warm up your email accounts before sending a single cold email. Build reputation gradually over 2 to 4 weeks.
- Use verified contact data only. Never purchase or scrape lists.
- Ramp your volume slowly. Start with 10 to 20 emails per day and increase by 20 to 30% weekly.
“My Emails Were Fine, Then Suddenly Stopped Reaching Inboxes”
This is the most frustrating scenario. You had great deliverability, and then it collapsed. Several things can cause this.
- Compromised account: Someone gained access and started sending spam without your knowledge.
- Shared IP neighbor: Another sender on your shared hosting IP started spamming, dragging your reputation down.
- List decay: Addresses that worked six months ago are now spam traps.
- Engagement drop: Your recipients stopped opening and clicking, which triggered a reputation decline over time.
The fix:
- Audit your account security immediately. Change passwords and enable two-factor authentication.
- Check if your sending IP is shared and whether neighbors are causing issues.
- Re-verify your entire contact list.
- Run an email deliverability test to measure actual inbox placement.
“I’m Listed but My Emails Seem to Still Be Delivering”
If your emails still reach the inbox despite a blacklist listing, you’re likely on a low-impact or negligible list. This happens when:
- You’re on UCEPROTECT L2 or L3 due to your hosting provider’s IP range, not your own behavior.
- You’re on obscure lists that Gmail and Outlook don’t reference.
- The listing is cosmetic. It shows up on MXToolbox but affects nothing in practice.
The fix: Monitor, but don’t submit removal requests to lists that auto-expire or can’t be removed. Verify your actual inbox placement rates. If they’re above 90%, the listing is noise.
How to Check If You’re Blacklisted (Diagnostic Decision Tree)
Don’t just run a blacklist checker and panic at the results. Follow this decision tree to diagnose the actual impact.
Step 1: Check Your SMTP Bounce Logs First
Your bounce logs are the most honest signal.
They tell you exactly which list rejected you and which recipient’s server enforced the block. Start here before checking any external tool.
Step 2: Run an MXToolbox Blacklist Check
Go to MXToolbox and run a blacklist scan on your sending IP and domain. It checks 100+ lists. But interpret the results through the severity framework above.
If you’re only on UCEPROTECT L2/L3 or obscure lists, you likely have no real problem.
Step 3: Check Spamhaus Specifically
Visit check.spamhaus.org and look up your IP and domain separately. Since Spamhaus is the most impactful blacklist, a clean result here is the most important signal.
Step 4: Check Google Postmaster Tools
Google Postmaster Tools shows your Gmail-specific reputation. It reveals your spam rate, domain reputation, and IP reputation directly from Google’s perspective.
Step 5: Check Microsoft SNDS
Microsoft SNDS shows how Outlook, Hotmail, and Live.com view your sending traffic. If Outlook is specifically blocking you, this data will show it.
Step 6: Run an Inbox Placement Test
An inbox placement test sends your email to seed addresses across Gmail, Outlook, and Yahoo. It shows you where your emails actually land: inbox, spam, or missing entirely.
The key insight: being listed does not always equal having a deliverability problem. Confirm actual impact before taking action.
TrulyInbox’s Account Health Monitoring automates this process.
It checks blacklists daily alongside SPF, DKIM, and DMARC status, so you catch issues before they become emergencies.
Blacklist-by-Blacklist Removal Playbook
Each blacklist has its own removal process, timeline, and quirks. Here’s what you need to know for each one.
Spamhaus (SBL / XBL / DBL)
Spamhaus is the most impactful blacklist, and its removal process reflects that. They take listings seriously and expect you to do the same.
SBL (Spamhaus Block List):
- Go to the Spamhaus IP & Domain Reputation Checker at spamhaus.org.
- Look up your IP or domain to see your listing details.
- Submit a removal request with a detailed explanation of what caused the issue and what you fixed.
- Spamhaus routes SBL requests through human review. Be specific and honest. Vague explanations get denied.
- Timeline: days, not hours. Expect 24 to 72 hours for review.
XBL (Exploits Block List):
- XBL listings originate from the CBL (Composite Blocking List).
- Fix the compromised system, malware, or open relay first.
- Request removal through abuseat.org.
- Removal is near-instant once the underlying issue is resolved.
DBL (Domain Block List):
- Look up your domain at spamhaus.org.
- Domain listings are harder to clear because they follow your brand across IP changes.
- You may need to rebuild your sender reputation over time with consistent and clean sending behavior.
A critical warning: if you get re-listed after removal, future removal becomes significantly harder.
Fix the root cause thoroughly before requesting delisting.
Barracuda (BRBL)
Barracuda is the second most impactful blacklist for B2B senders because many businesses run Barracuda email security appliances.
- Submit your removal request at barracudacentral.org/rbl/removal-request.
- Provide your email server IP address, your email address, and your phone number.
- Include a reason for removal. Requests with clear explanations process faster.
- Do not submit multiple requests. Barracuda explicitly ignores duplicate submissions.
- Timeline: typically 12 to 24 hours.
Make sure you’ve fixed the issue before submitting. Premature requests waste your one shot at a clean removal.
SpamCop
SpamCop operates differently from most blacklists. It’s primarily time-based.
- Listings auto-expire within 24 to 48 hours if the spam stops.
- You cannot manually request removal in most cases.
- Focus entirely on stopping the behavior that triggered the listing. The listing resolves itself.
- If you see persistent SpamCop listings, it means ongoing complaints are feeding the system. Fix the root cause.
CBL (Composite Blocking List)
The CBL focuses on IPs exhibiting bot-like or malware-driven sending behavior.
- Visit abuseat.org and look up your IP address.
- The system provides specific details about why you’re listed and what you need to fix.
- Secure your server: remove malware, close open relays, and patch vulnerabilities.
- Request removal through the self-service tool. Removal is automated and quick.
- The listing will return immediately if the underlying issue persists.
UCEPROTECT (L1 / L2 / L3): Why You Probably Shouldn’t Bother
UCEPROTECT causes more confusion and panic than any other blacklist, and it deserves it the least. Here’s why.
Level 1 (Your Specific IP):
- Auto-expires in 7 days if spam from your IP stops.
- UCEPROTECT offers a paid “express removal” for roughly 50 Euros per IP. I don’t recommend paying. The listing has minimal impact, and paying doesn’t fix the root cause.
Level 2 (Your IP Range):
- You cannot remove yourself. It’s based on your hosting provider’s entire IP range behavior.
- The listing reflects your provider’s network hygiene, not your individual sending.
Level 3 (Your Entire ASN):
- This covers your hosting provider’s complete network. It’s entirely outside your control.
- Complain to your provider or switch providers. Those are the only real options.
My recommendation: if you’re only on UCEPROTECT, you likely have no real deliverability problem. Run an inbox placement test to verify before spending any time or money on removal.
Microsoft / Outlook-Specific Blocking
Microsoft doesn’t use traditional public blacklists. It runs its own internal filtering system, which functions like a proprietary blacklist.
- Check your reputation via Microsoft SNDS.
- Submit a delist request at sender.office.com if your IP is blocked.
- For error code 5.7.511, email [email protected] directly, as the portal won’t work for this specific error.
- Timeline: Microsoft is notoriously slow. Expect 24 to 72+ hours.
If Outlook specifically is blocking you, this is the path to take. MXToolbox won’t help here.
You can land on a blacklist without sending a single spammy email. How? Shared hosting.
If you host your email on shared infrastructure (HostGator, GoDaddy, Bluehost, or similar), you share an IP with hundreds of other senders. When any one of them spams, the IP gets blacklisted and you become collateral damage.
This is the number one cause of “unfair” blacklisting for small businesses.
How to Identify the Problem
- Find your sending IP address from your email headers or hosting control panel.
- Run that IP through MXToolbox’s blacklist check.
- Check who else sends from the same IP. Tools like IPinfo.io can reveal other domains sharing your server.
If you see blacklistings on an IP you don’t control, shared hosting is likely the root cause.
Solutions (Ranked by Effort and Cost)
- Request a dedicated IP from your host. This only makes sense if your sending volume justifies it (typically 50,000+ emails per month).
- Switch to a reputable email hosting provider. Google Workspace and Microsoft 365 manage their IP reputation aggressively.
- Use a cold email platform with managed sending infrastructure. These platforms rotate IPs and isolate senders from each other.
- Separate marketing sends from business email. Use dedicated subdomains for marketing so your primary domain stays clean.
The right solution depends on your volume, budget, and use case. But doing nothing guarantees repeated blacklisting from your neighbors’ behavior.
How to Prevent Blacklisting: Ongoing Monitoring, Not a One-Time Fix
Blacklist prevention isn’t a checklist you complete once. It’s ongoing hygiene that you build into your weekly routine.
Think of it this way: you don’t brush your teeth once and declare your dental health solved. Email reputation works the same way.
Authentication Foundation (Set Once, Verify Monthly)
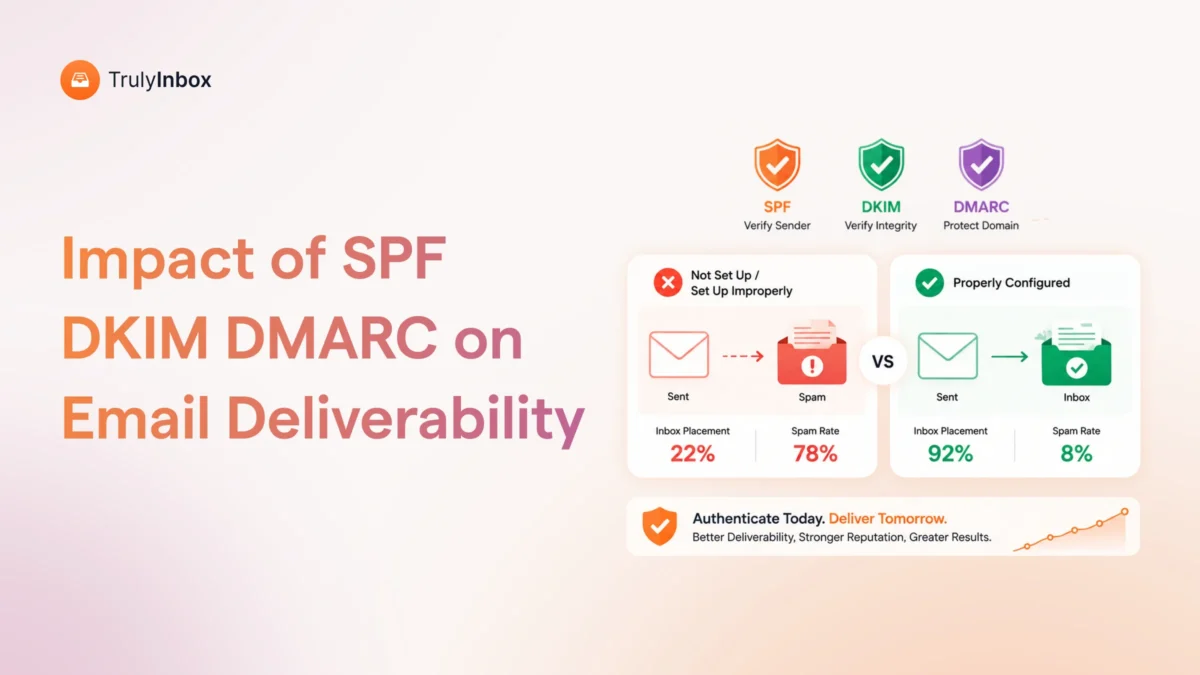
Set up SPF, DKIM, and DMARC before sending anything. These authentication records tell receiving servers that your emails are legitimate.
But setup alone isn’t enough. Verify these records monthly. Provider changes, DNS edits, and hosting migrations can silently break your SPF record without you noticing.
DMARC reporting reveals unauthorized use of your domain. If someone spoofs your address and triggers blacklisting, your DMARC reports will show the evidence.
Warm Up Before You Scale (Non-Negotiable)
New domains and accounts have zero reputation. ISPs treat them as suspicious by default until they prove otherwise.
Gradual volume increase with positive engagement signals builds that trust. Email warmup creates a reputation buffer that protects you against minor issues down the road.
Here’s what most people get wrong: they stop warmup after the initial ramp. Continuous warmup maintains your reputation even during periods of low sending.
TrulyInbox’s AI Adaptive warmup strategy auto-adjusts volume based on real-time reputation signals, so your accounts stay protected without manual intervention.
List Hygiene as Blacklist Insurance
Clean lists prevent the number one blacklisting trigger: spam traps. Here’s your list hygiene checklist:
- Verify emails before sending. Check for syntax errors, invalid MX records, and catch-all domains.
- Remove hard bounces immediately after every send.
- Remove soft bounces after 3 consecutive failed attempts.
- Re-verify any list older than 90 days. Email addresses decay into spam traps faster than you think.
- Never purchase or scrape email lists. Ever.
- Sunset disengaged contacts after 90 days of no opens.
Volume Discipline and Sending Patterns
How you send matters just as much as what you send. ISPs flag unnatural sending patterns as spam behavior.
Follow these guidelines:
- Never increase daily volume by more than 20 to 30% week over week.
- Use sending schedules that mimic human patterns. Sending 1,000 emails at 2am looks like a bot.
- Spread your sends across business hours in the recipient’s timezone.
- Keep your spam complaint rate under 0.1%. Google publishes this as their threshold.
- Keep your bounce rate under 2% per campaign.
Weekly Monitoring Routine (5 Minutes That Save Weeks of Recovery)
Build this into your Monday morning workflow. It takes 5 minutes and catches problems before they escalate.
- Monday: Check Google Postmaster Tools dashboard. Look at your reputation score, spam rate, and authentication pass rates.
- Monday: Run a quick MXToolbox blacklist scan on your primary sending IP and domain.
- Ongoing: Review bounce codes in your sending platform. SMTP 550 errors are early warning signs.
- Monthly: Run an inbox placement test across Gmail, Outlook, and Yahoo.
TrulyInbox’s Account Health Monitoring automates daily checks for SPF, DKIM, DMARC status and blacklist monitoring. It flags issues the moment they appear so you can act before your deliverability suffers.
FAQs
1. How long does it take to get off an email blacklist?
It depends on the list. SpamCop auto-expires in 24 to 48 hours. Spamhaus XBL removes you almost instantly after you fix the compromised system. Spamhaus SBL requires human review and can take days. UCEPROTECT L1 auto-expires in 7 days. Microsoft can take 72+ hours through their delist portal.
2. Does being on a blacklist always mean my emails go to spam?
No. Gmail and Outlook primarily use their own internal reputation systems, not public blacklists. Public blacklist listings mostly affect B2B recipients who use corporate email security tools like Proofpoint, Mimecast, or Barracuda. Always verify your actual inbox placement before panicking.
3. Can I be blacklisted without doing anything wrong?
Yes. Shared hosting IPs can get blacklisted because of another sender on the same server. Compromised accounts you didn’t know about can trigger listings. Network-level listings like UCEPROTECT L2/L3 can flag your entire hosting provider’s range without any action on your part.
4. What’s the difference between IP blacklisting and domain blacklisting?
IP blacklisting affects your sending server’s address. You can escape it by changing IPs or switching providers. Domain blacklisting follows your brand. It persists across IP changes and is harder to recover from because you can’t simply swap your domain the way you swap IPs.
5. Should I use a different domain if I get blacklisted?
Only as a last resort, and only if you’re on a critical list like Spamhaus DBL with no clear path to removal. A new domain starts with zero reputation and needs weeks of warmup. Fix the root cause on your current domain first. Abandoning a domain should be your final option, not your first reaction.
6. How does email warm-up help prevent blacklisting?
Warmup builds positive engagement signals like opens, replies, and inbox moves. These signals create a reputation buffer with mailbox providers. ISPs are more forgiving of minor issues when your domain has earned trust through consistent positive interactions. Think of warmup as insurance: you invest upfront so a small mistake doesn’t wipe out your reputation.